This page provides an instruction & guide for developers building a GPT Action for a specific application. Before you proceed, make sure to first familiarize yourself with the following information:
This particular GPT Action provides an overview of how to connect to Google BigQuery, Google Cloud's Analytical Data Warehouse. This Action takes a user’s question, scans the relevant tables to gather the data schema, then writes a SQL query to answer the user’s question.
Note: these instructions return back a functioning SQL statement, rather than the result itself. Currently middleware is required to return back a CSV file – we’ll be posting instructions on an example of that soon
Value + Example Business Use Cases
Value: Users can now leverage ChatGPT's natural language capability to connect directly to BigQuery's DWH.
Example Use Cases:
- Data scientists can connect to tables and run data analyses using ChatGPT's Data Analysis
- Citizen data users can ask basic questions of their transactional data
- Users gain more visibility into their data & potential anomalies
Application Information
Application Key Links
Check out these links from the application before you get started:
- Application Website: https://cloud.google.com/bigquery
- Application API Documentation: https://cloud.google.com/bigquery/docs/reference/rest
Application Prerequisites
Before you get started, make sure you go through the following steps in your application environment:
- Set up a GCP project
- Set up a BQ dataset in that GCP project
- Ensure that the user authenticating into BigQuery via ChatGPT has access to that BQ dataset
ChatGPT Steps
Custom GPT Instructions
Once you've created a Custom GPT, copy the text below in the Instructions panel. Have questions? Check out Getting Started Example to see how this step works in more detail.
**Context**: You are an expert at writing BigQuery SQL queries. A user is going to ask you a question.

**Instructions**:
1. No matter the user's question, start by running `runQuery` operation using this query: "SELECT column_name, table_name, data_type, description FROM `{project}.{dataset}.INFORMATION_SCHEMA.COLUMN_FIELD_PATHS`"
-- Assume project = "<insert your default project here>", dataset = "<insert your default dataset here>", unless the user provides different values
-- Remember to include useLegacySql:false in the json output
2. Convert the user's question into a SQL statement that leverages the step above and run the `runQuery` operation on that SQL statement to confirm the query works. Add a limit of 100 rows
3. Now remove the limit of 100 rows and return back the query for the user to see

**Additional Notes**: If the user says "Let's get started", explain that the user can provide a project or dataset, along with a question they want answered. If the user has no ideas, suggest that we have a sample flights dataset they can query - ask if they want you to query that
OpenAPI Schema
Once you've created a Custom GPT, copy the text below in the Actions panel. Have questions? Check out Getting Started Example to see how this step works in more detail.
openapi: 3.1.0
info:
  title: BigQuery API
  description: API for querying a BigQuery table.
  version: 1.0.0
servers:
  - url: https://bigquery.googleapis.com/bigquery/v2
    description: Google BigQuery API server
paths:
  /projects/{projectId}/queries:
    post:
      operationId: runQuery
      summary: Executes a query on a specified BigQuery table.
      description: Submits a query to BigQuery and returns the results.
      x-openai-isConsequential: false
      parameters:
        - name: projectId
          in: path
          required: true
          description: The ID of the Google Cloud project.
          schema:
            type: string
      requestBody:
        required: true
        content:
          application/json:
            schema:
              type: object
              properties:
                query:
                  type: string
                  description: The SQL query string.
                useLegacySql:
                  type: boolean
                  description: Whether to use legacy SQL.
                  default: false
      responses:
        '200':
          description: Successful query execution.
          content:
            application/json:
              schema:
                type: object
                properties:
                  kind:
                    type: string
                    example: "bigquery#queryResponse"
                  schema:
                    type: object
                    description: The schema of the results.
                  jobReference:
                    type: object
                    properties:
                      projectId:
                        type: string
                      jobId:
                        type: string
                  rows:
                    type: array
                    items:
                      type: object
                      properties:
                        f:
                          type: array
                          items:
                            type: object
                            properties:
                              v:
                                type: string
                  totalRows:
                    type: string
                    description: Total number of rows in the query result.
                  pageToken:
                    type: string
                    description: Token for pagination of query results.
        '400':
          description: Bad request. The request was invalid.
        '401':
          description: Unauthorized. Authentication is required.
        '403':
          description: Forbidden. The request is not allowed.
        '404':
          description: Not found. The specified resource was not found.
        '500':
          description: Internal server error. An error occurred while processing the request.
Authentication Instructions
Below are instructions on setting up authentication with this 3rd party application. Have questions? Check out Getting Started Example to see how this step works in more detail.
Pre-Action Steps
Before you set up authentication in ChatGPT, please take the following steps in the application.
- Go to the Google Cloud Console
- Navigate to API & Services > Credentials
- Create new OAuth credentials (or use an existing one)
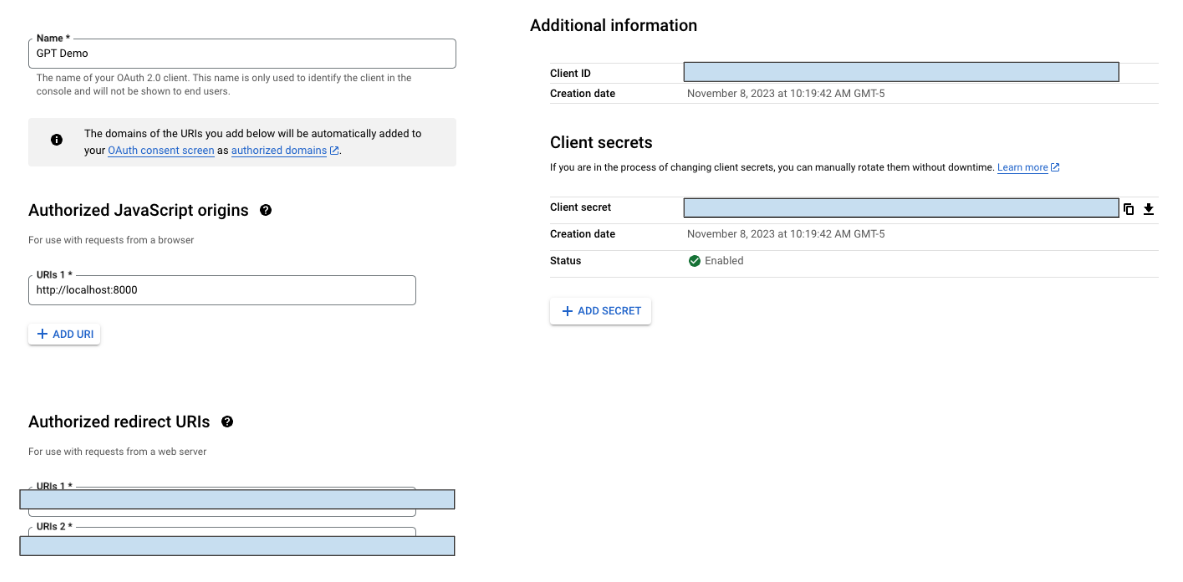
- Locate your OAuth Client ID & Client Secret and store both values securely (see screenshot below)
In ChatGPT
In ChatGPT, click on "Authentication" and choose "OAuth". Enter in the information below.
- Client ID: use Client ID from steps above
- Client Secret: use Client Secret from steps above
- Authorization URL: https://accounts.google.com/o/oauth2/auth
- Token URL: https://oauth2.googleapis.com/token
- Scope: https://www.googleapis.com/auth/bigquery
- Token: Default (POST)
Post-Action Steps
Once you've set up authentication in ChatGPT, follow the steps below in the application to finalize the Action.
- Copy the callback URL from the GPT Action
- In the “Authorized redirect URIs” (see screenshot above), add your callback URL
FAQ & Troubleshooting
- Callback URL Error: If you get a callback URL error in ChatGPT, pay close attention to the screenshot above. You need to add the callback URL directly into GCP for the action to authenticate correctly
- Schema calls the wrong project or dataset: If ChatGPT calls the wrong project or dataset, consider updating your instructions to make it more explicit either (a) which project / dataset should be called or (b) to require the user provide those exact details before it runs the query
Are there integrations that you’d like us to prioritize? Are there errors in our integrations? File a PR or issue in our github, and we’ll take a look.