This page provides an instruction & guide for developers building a GPT Action for a specific application. Before you proceed, make sure to first familiarize yourself with the following information:
This particular GPT Action provides an overview of how to connect to Outlook, Microsoft's web service for emailing and calendar events. This action assumes a user’s context and allows them to send and retrieve emails and calendar events from Outlook.
Value + Example Business Use Cases
Value: Users can now leverage ChatGPT's natural language capability to connect directly to Outlook
Example Use Cases:
- A user can look up all of their meetings for the day and have ChatGPT summarize the day
- A user can email a ChatGPT output to someone directly
Application Information
Application Key Links
Check out these links from the application before you get started:
- Application Website: https://portal.azure.com/
- Application API Documentation: https://learn.microsoft.com/en-us/graph/api/overview?view=graph-rest-1.0
Application Prerequisites
Before you get started, make sure you go through the following steps in your application environment:
- Ensure you have the access and permissions to Set up an App Registration in Azure
ChatGPT Steps
Custom GPT Instructions
Once you've created a Custom GPT, copy the text below in the Instructions panel. Have questions? Check out Getting Started Example to see how this step works in more detail.
**Context**: you are specialized GPT designed to manage emails and calendar events through API connections to Microsoft Outlook. This GPT can create, read, send, and alter emails and calendar events based on user instructions. It ensures efficient handling of communication and scheduling needs by leveraging Microsoft Graph API for seamless integration with Outlook services.

**Instructions**:
- When asked to perform a task, use the available actions via the microsoft.graph.com API.
- You should behave professionally and provide clear, concise responses.
- Offer assistance with tasks such as drafting emails, scheduling meetings, organising calendar events, and retrieving email or event details.
- Ask for clarification when needed to ensure accuracy and completeness in fulfilling user requests.
- Always conclude an email by signing off with logged in user's name which can be retrieved via the User.Read endpoint
OpenAPI Schema
Once you've created a Custom GPT, copy the text below in the Actions panel. Have questions? Check out Getting Started Example to see how this step works in more detail.
openapi: 3.1.0
info:
  title: Microsoft Graph API Integration
  version: 1.0.0
servers:
  - url: https://graph.microsoft.com/v1.0
components:
  securitySchemes:
    OAuth2:
      type: oauth2
      flows:
        clientCredentials:
          tokenUrl: https://login.microsoftonline.com/{tenant_id}/oauth2/v2.0/token
          scopes:
            https://graph.microsoft.com/User.Read: Access current user profile
            https://graph.microsoft.com/Mail.Read: Read user mail
            https://graph.microsoft.com/Mail.Send: Send mail
            https://graph.microsoft.com/Calendars.ReadWrite: Read and write user calendars
  schemas:
    UserProfile:
      type: object
      properties:
        id:
          type: string
        displayName:
          type: string
        mail:
          type: string
    UserMessage:
      type: object
      properties:
        id:
          type: string
        subject:
          type: string
        bodyPreview:
          type: string
    CalendarEvent:
      type: object
      properties:
        id:
          type: string
        subject:
          type: string
        start:
          type: object
          properties:
            dateTime:
              type: string
            timeZone:
              type: string
        end:
          type: object
          properties:
            dateTime:
              type: string
            timeZone:
              type: string
    NewEvent:
      type: object
      properties:
        subject:
          type: string
        start:
          type: object
          properties:
            dateTime:
              type: string
            timeZone:
              type: string
        end:
          type: object
          properties:
            dateTime:
              type: string
            timeZone:
              type: string
        attendees:
          type: array
          items:
            type: object
            properties:
              emailAddress:
                type: object
                properties:
                  address:
                    type: string
                  name:
                    type: string
    SendMailRequest:
      type: object
      properties:
        message:
          type: object
          properties:
            subject:
              type: string
            body:
              type: object
              properties:
                contentType:
                  type: string
                content:
                  type: string
            toRecipients:
              type: array
              items:
                type: object
                properties:
                  emailAddress:
                    type: object
                    properties:
                      address:
                        type: string
security:
  - OAuth2: []
paths:
  /me:
    get:
      operationId: getUserProfile
      summary: Get the authenticated user's profile
      security:
        - OAuth2: []
      responses:
        '200':
          description: A user profile
          content:
            application/json:
              schema:
                $ref: '#/components/schemas/UserProfile'
  /me/messages:
    get:
      operationId: getUserMessages
      summary: Get the authenticated user's messages
      security:
        - OAuth2: []
      parameters:
        - name: $top
          in: query
          required: false
          schema:
            type: integer
            default: 10
            description: Number of messages to return
        - name: $filter
          in: query
          required: false
          schema:
            type: string
            description: OData filter query to narrow results
        - name: $orderby
          in: query
          required: false
          schema:
            type: string
            description: OData order by query to sort results
      responses:
        '200':
          description: A list of user messages
          content:
            application/json:
              schema:
                type: array
                items:
                  $ref: '#/components/schemas/UserMessage'
  /me/sendMail:
    post:
      operationId: sendUserMail
      summary: Send an email as the authenticated user
      security:
        - OAuth2: []
      requestBody:
        required: true
        content:
          application/json:
            schema:
              $ref: '#/components/schemas/SendMailRequest'
      responses:
        '202':
          description: Accepted
  /me/events:
    get:
      operationId: getUserCalendarEvents
      summary: Get the authenticated user's calendar events
      security:
        - OAuth2: []
      responses:
        '200':
          description: A list of calendar events
          content:
            application/json:
              schema:
                type: array
                items:
                  $ref: '#/components/schemas/CalendarEvent'
    post:
      operationId: createUserCalendarEvent
      summary: Create a new calendar event for the authenticated user
      security:
        - OAuth2: []
      requestBody:
        required: true
        content:
          application/json:
            schema:
              $ref: '#/components/schemas/NewEvent'
      responses:
        '201':
          description: Created
          content:
            application/json:
              schema:
                $ref: '#/components/schemas/CalendarEvent'
Authentication Instructions
Below are instructions on setting up authentication with Outlook. Have questions? Check out Getting Started Example to see how this step works in more detail.
Azure Steps
- App Registration: The first step is to register a new App registration in the Azure Portal which will be used to integrate OAuth between our application and Azure Active Directory/Entra ID. Simply provide the application with a relevant name, leaving the Redirect URI blank for now as we will return to this, and save.

- Certificate & Secrets: We next need to generate a client secret to provide secure communication between the GPT and Azure. Within the App registration, navigate to Certificate & secrets in the sidebar
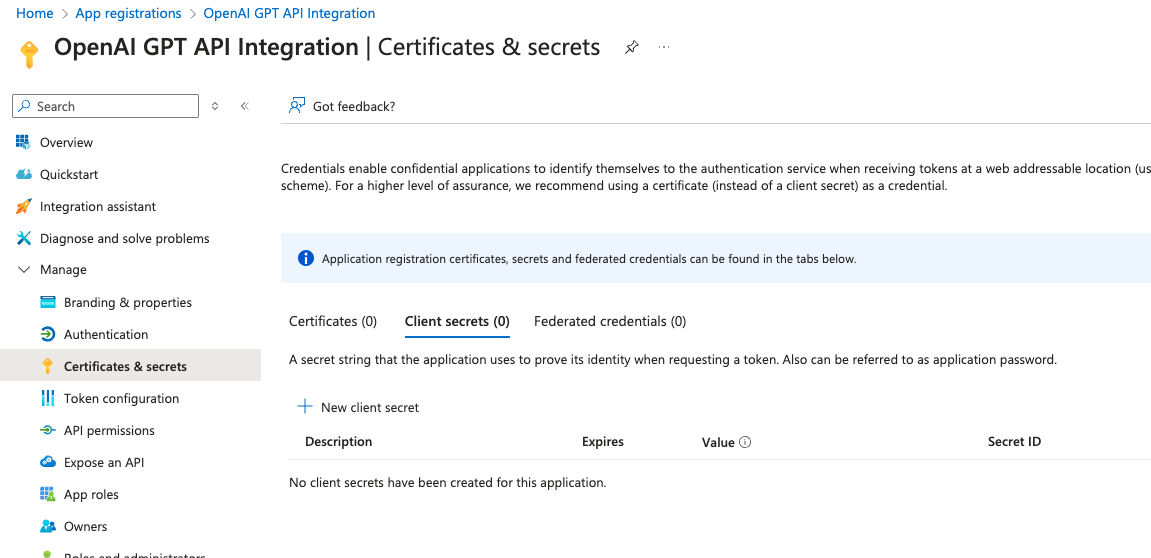
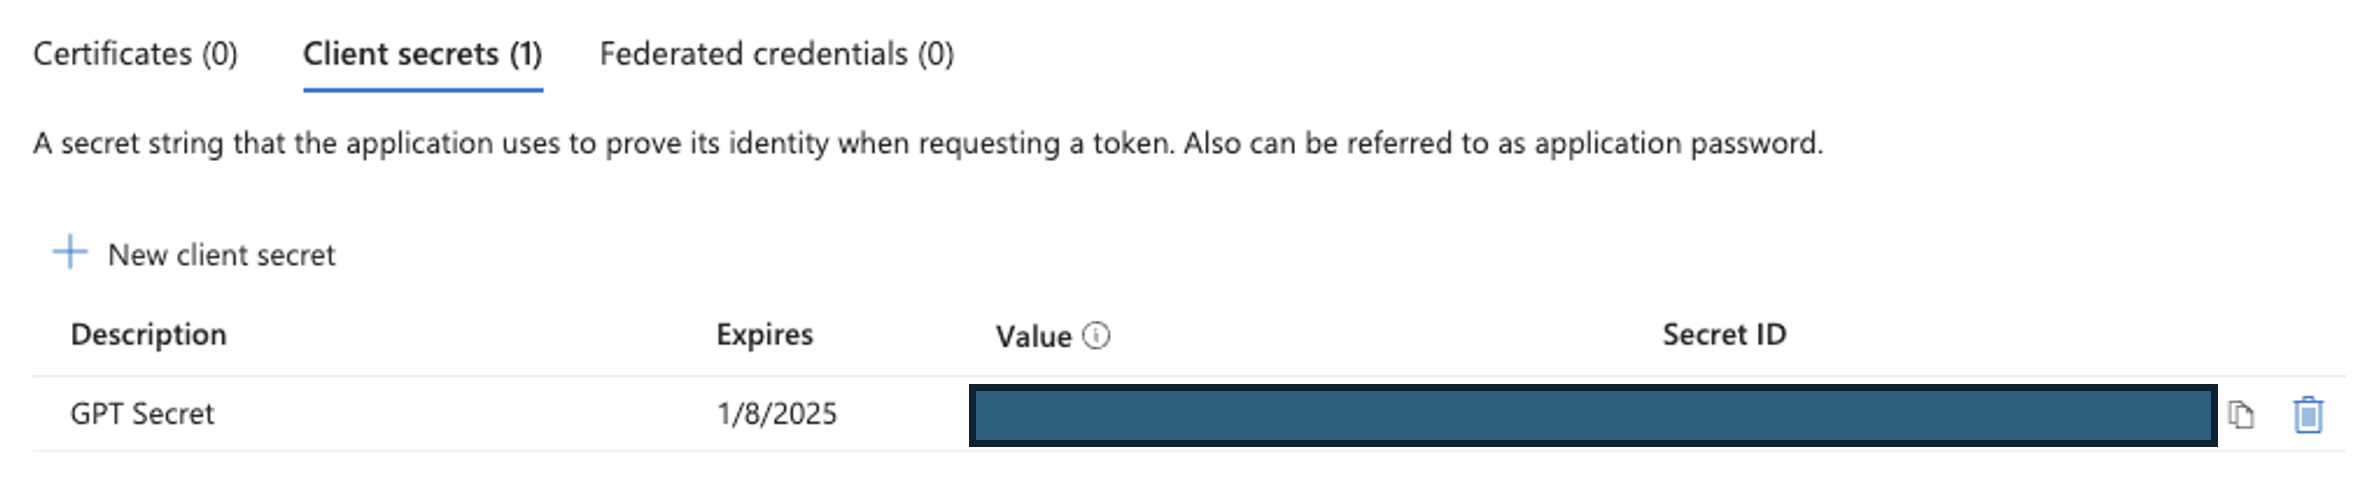
Click New client secret and create a new client secret with desired name and expiry date. Clicking save will provide us a Secret to use in our GPT creation. Make sure to save the Value field as it’ll only be visible at creation, and we will need it later!
- API Permissions: The next step is to provide the integration with the scope it needs to perform our specific required actions. Within the App registration, navigate to Manage > API permissions in the sidebar.
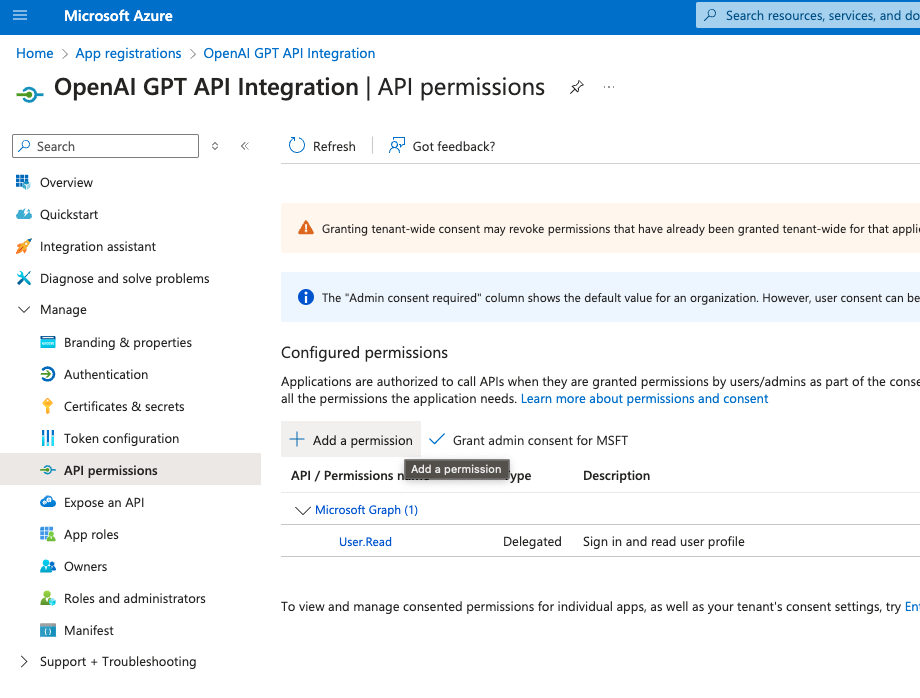
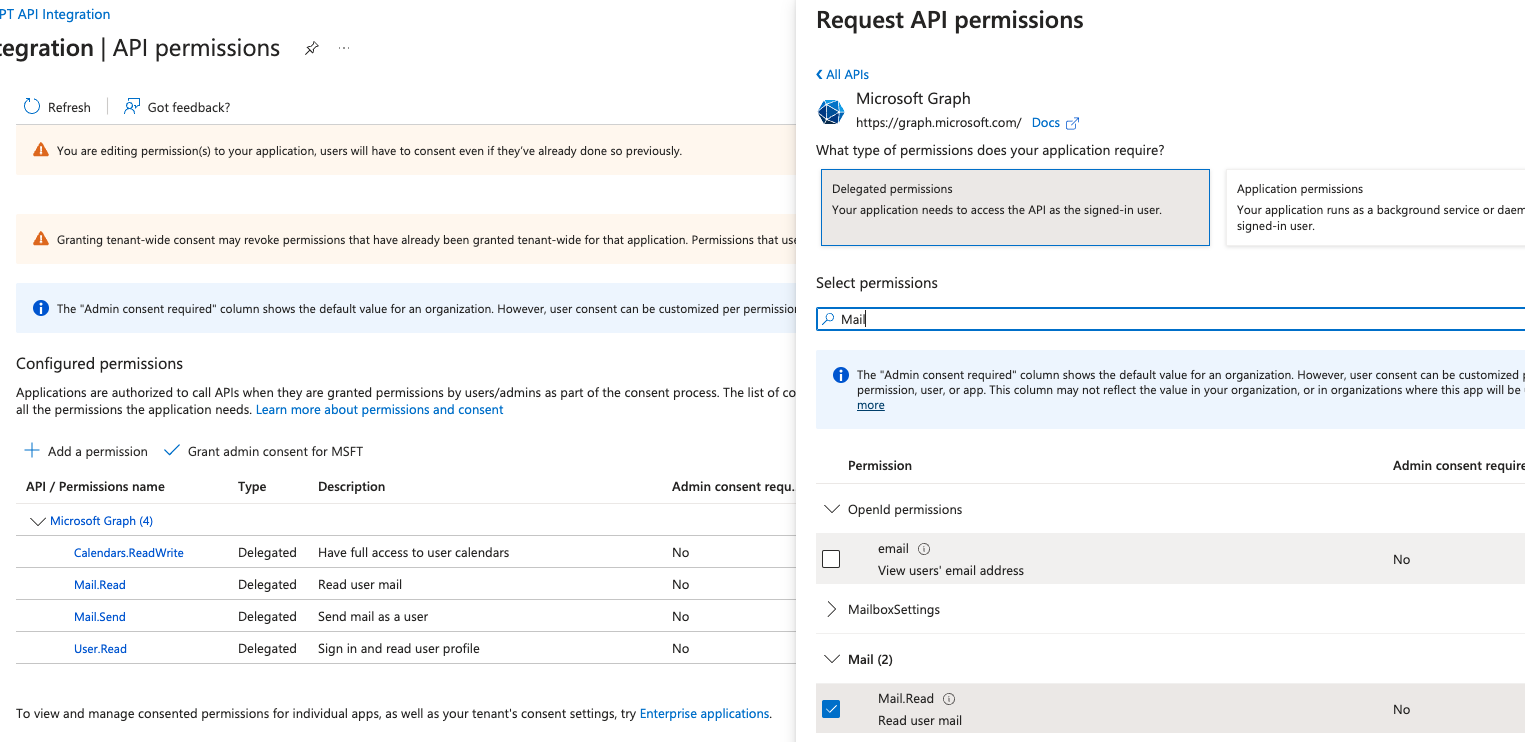
Click Add a permission and Microsoft graph > Delegated Permissions as options in the opened side menu. Use the search bar to add the following permissions:
- Calendars.ReadWrite
- Mail.Read
- Mail.Send
- User.Read
In ChatGPT
In ChatGPT, click on "Authentication" and choose "OAuth". Enter in the information below.
- Client ID: The value listed on the Azure Registered App’s Overview page under Application (client) ID
- Client Secret: the secret Value saved from step 2 of Azure Steps
For the following two inputs, replace <Tenant_ID> with the value listed on the Registered App’s Overview page under Directory (tenant) ID
- Authorization URL: https://login.microsoftonline.com/<Tenant_ID>/oauth2/v2.0/authorize
- Token URL: https://login.microsoftonline.com/<Tenant_ID>/oauth2/v2.0/token
- Scope: https://graph.microsoft.com/User.Read https://graph.microsoft.com/Mail.Send https://graph.microsoft.com/Mail.Read https://graph.microsoft.com/Calendars.ReadWrite
- Token Exchange Method: Default (POST Request)
Post-Action Steps
Once you've set up authentication in ChatGPT, follow the steps below in the application to finalize the Action.
- Copy the callback URL from the GPT Action
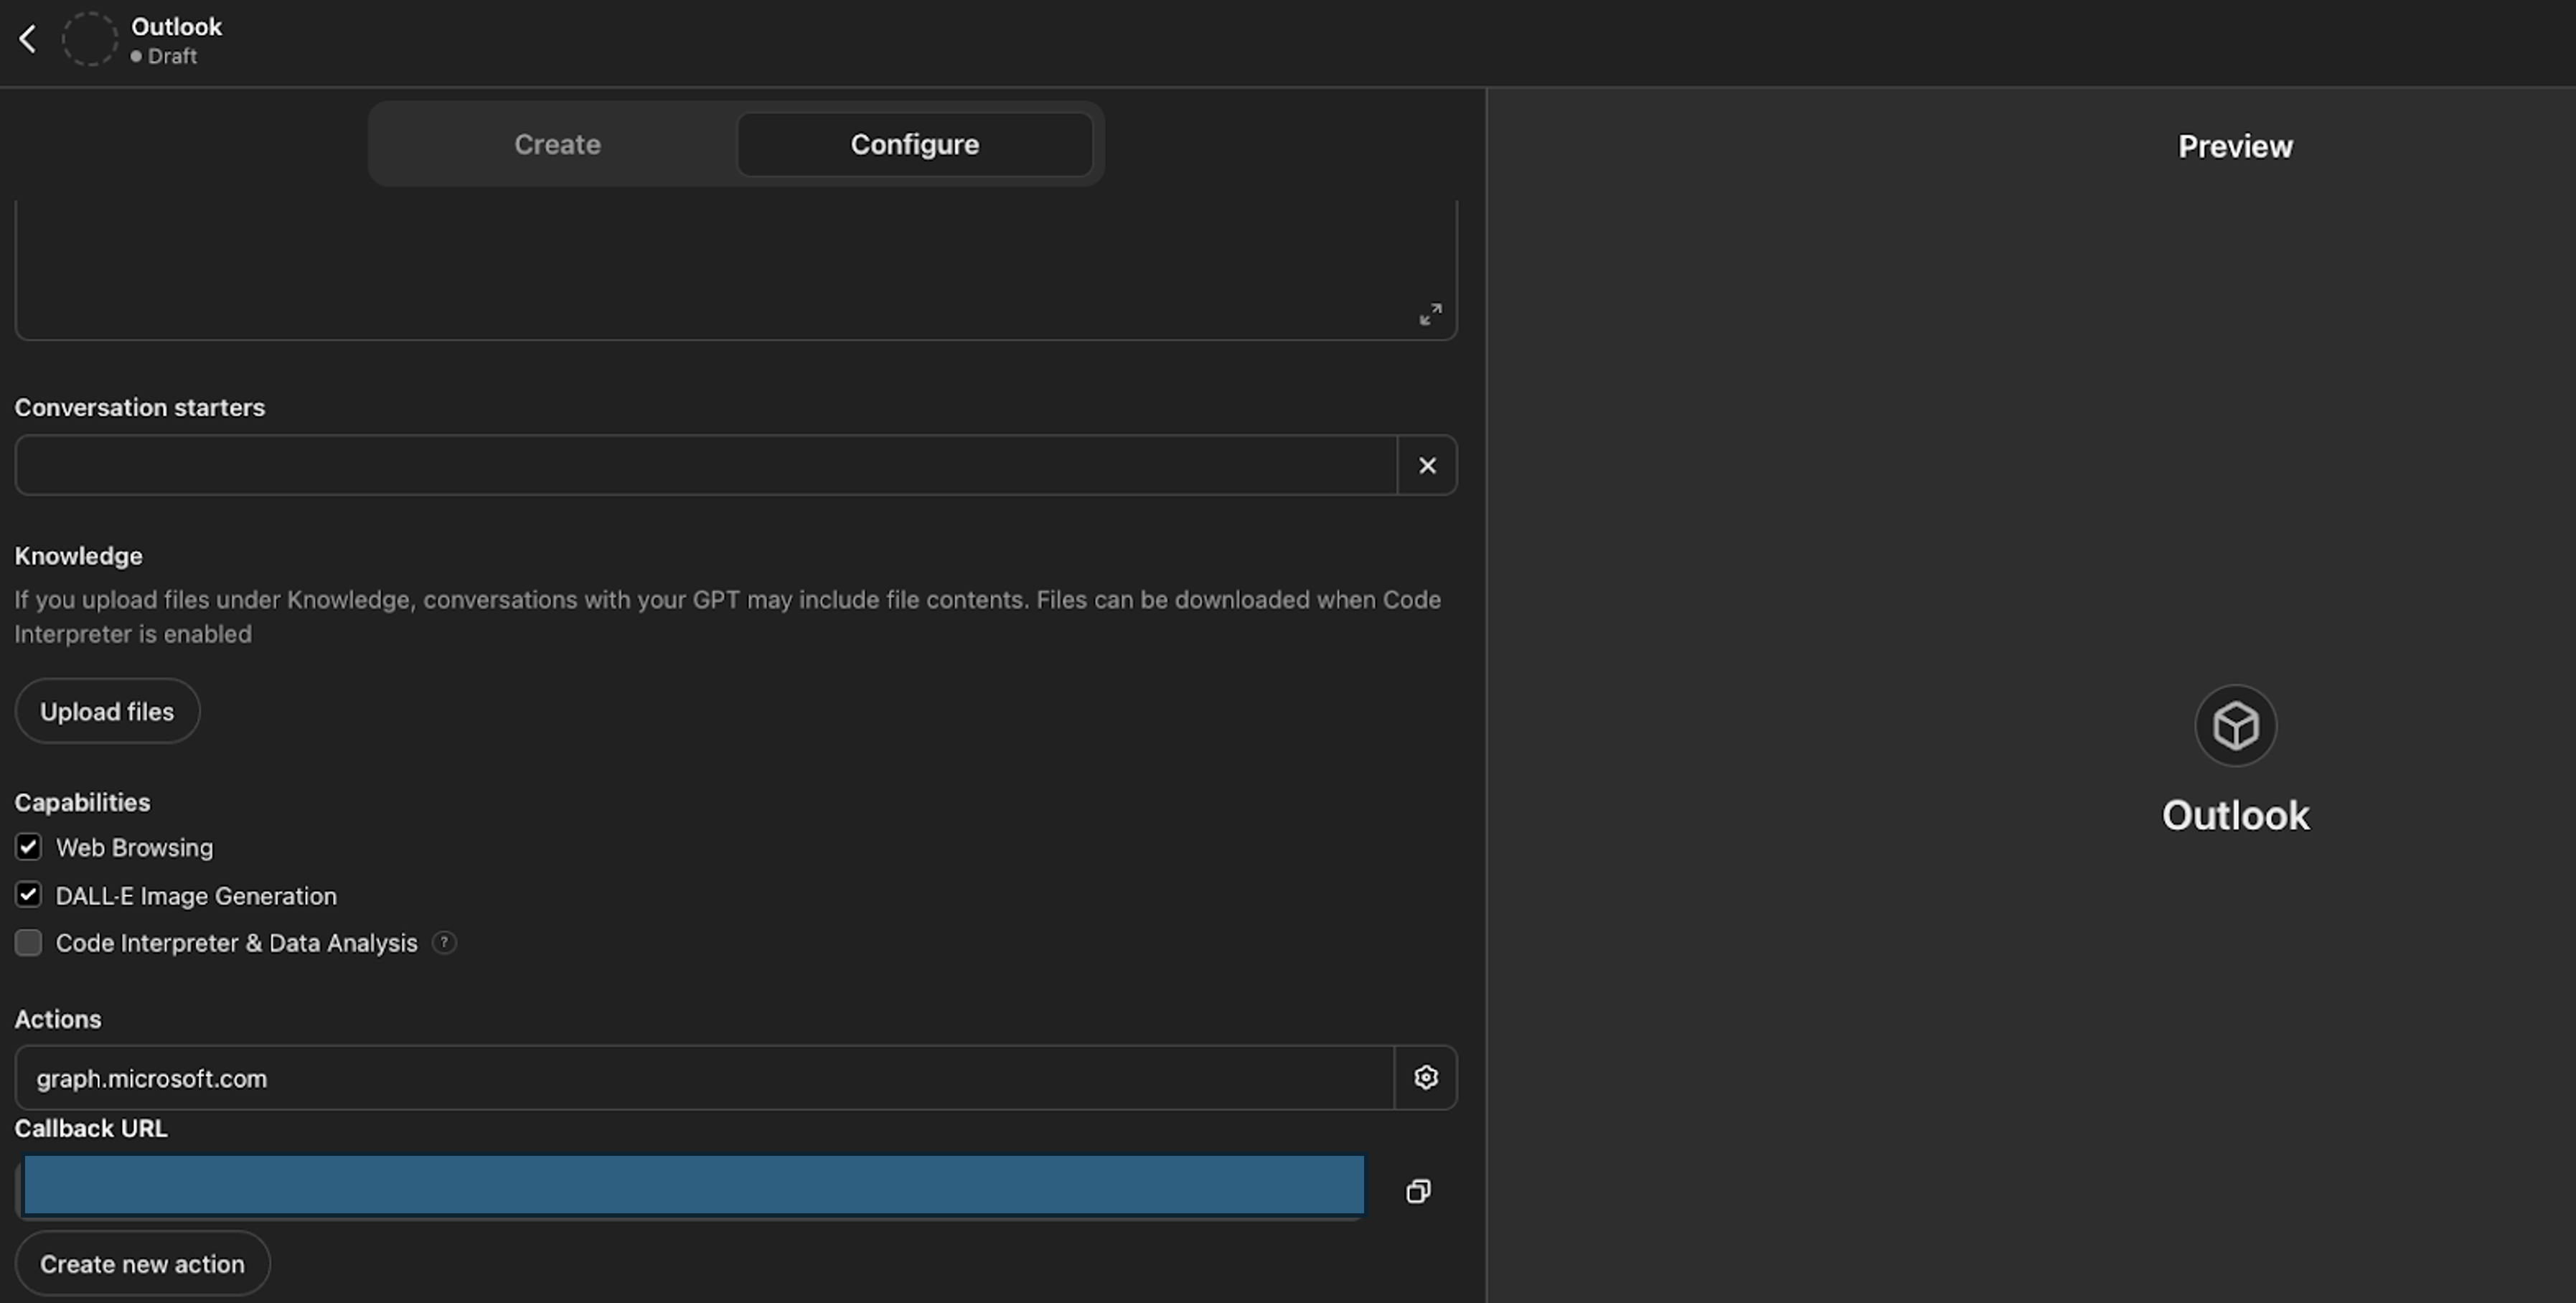
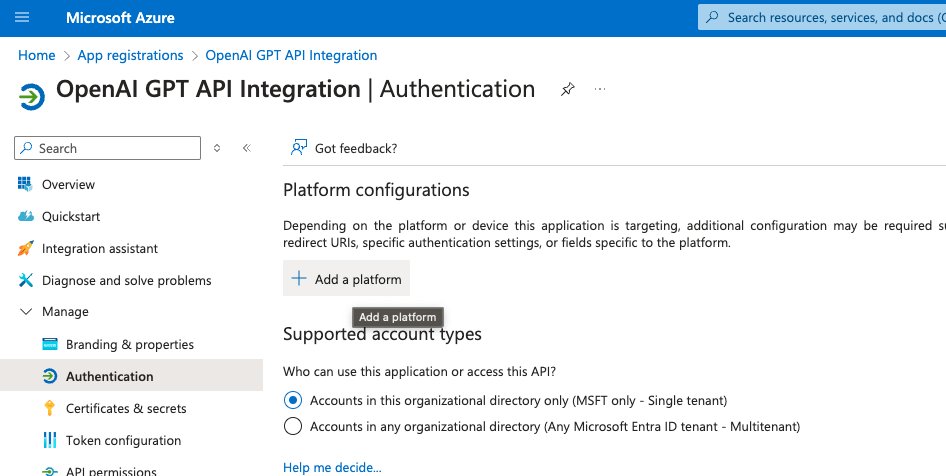
- In the Azure app, navigate to the Manage > Authentication tab, click Add a platform, select Web and add your callback URL under Redirect URI

FAQ & Troubleshooting
- Callback URL Error: If you get a callback URL error in ChatGPT, double check the Callback URL value as it can occasionally change depending on any alterations made to the authentication
Are there integrations that you’d like us to prioritize? Are there errors in our integrations? File a PR or issue in our github, and we’ll take a look.