This page provides an instruction & guide for developers building middleware to connect a GPT Action to a specific application. Before you proceed, make sure to first familiarize yourself with the following information:
This particular GPT Action provides an overview of how to build an Azure Function, MSFT's cloud-based function builder. This documentation helps a user set up an OAuth-protected Azure Function to connect to a GPT Action, and to a sample application.
Value + Example Business Use Cases
Value: Users can now leverage ChatGPT's natural language capability to connect directly to Azure Function. This can in a few ways:
- 100k character limit in GPT Actions: users can use the middleware to pre-process the text response from an API. For example, you can use OpenAI’s API in the middleware to summarize the text before sending it back to ChatGPT.
- Typically for actions, users are relying on the SaaS API to return text. You can convert the response for the vendor API into easily digestible text, and it can handle different data types such as structured and unstructured data.
- It can return files instead of just text. This can be useful to surface CSV files for Data Analysis, or bring back an PDF file and ChatGPT will treat it like an upload.
Example Use Cases:
- A user needs to look up files in Sharepoint, but needs a middleware app between ChatGPT and Sharepoint
- A user has built several steps in a row in an Azure function, and needs to be able to kick off that process using ChatGPT
Application Information
Application Key Links
Check out these links from the application before you get started:
- Application Website: https://learn.microsoft.com/en-us/azure/azure-functions/
- Application API Documentation: https://learn.microsoft.com/en-us/azure/azure-functions/functions-reference/
Application Prerequisites
Before you get started, make sure you go through the following steps in your application environment:
- Azure Portal with access to create Azure Function Apps and Azure Entra App Registrations
Application Setup
Installing the app
You can read more about languages and deployment options for Azure Functions on the left hand side of the documentation here.
Option 1: Use VSCode
See Microsoft’s documentation here for how to deploy using VSCode. If you have familiarity with this approach, feel free to use it.
Option 2: Directly in Azure Portal
See the documentation here for how to deploy using the Azure portal. We’ll walk through an example here step by step.
Part 1: Create Function
-
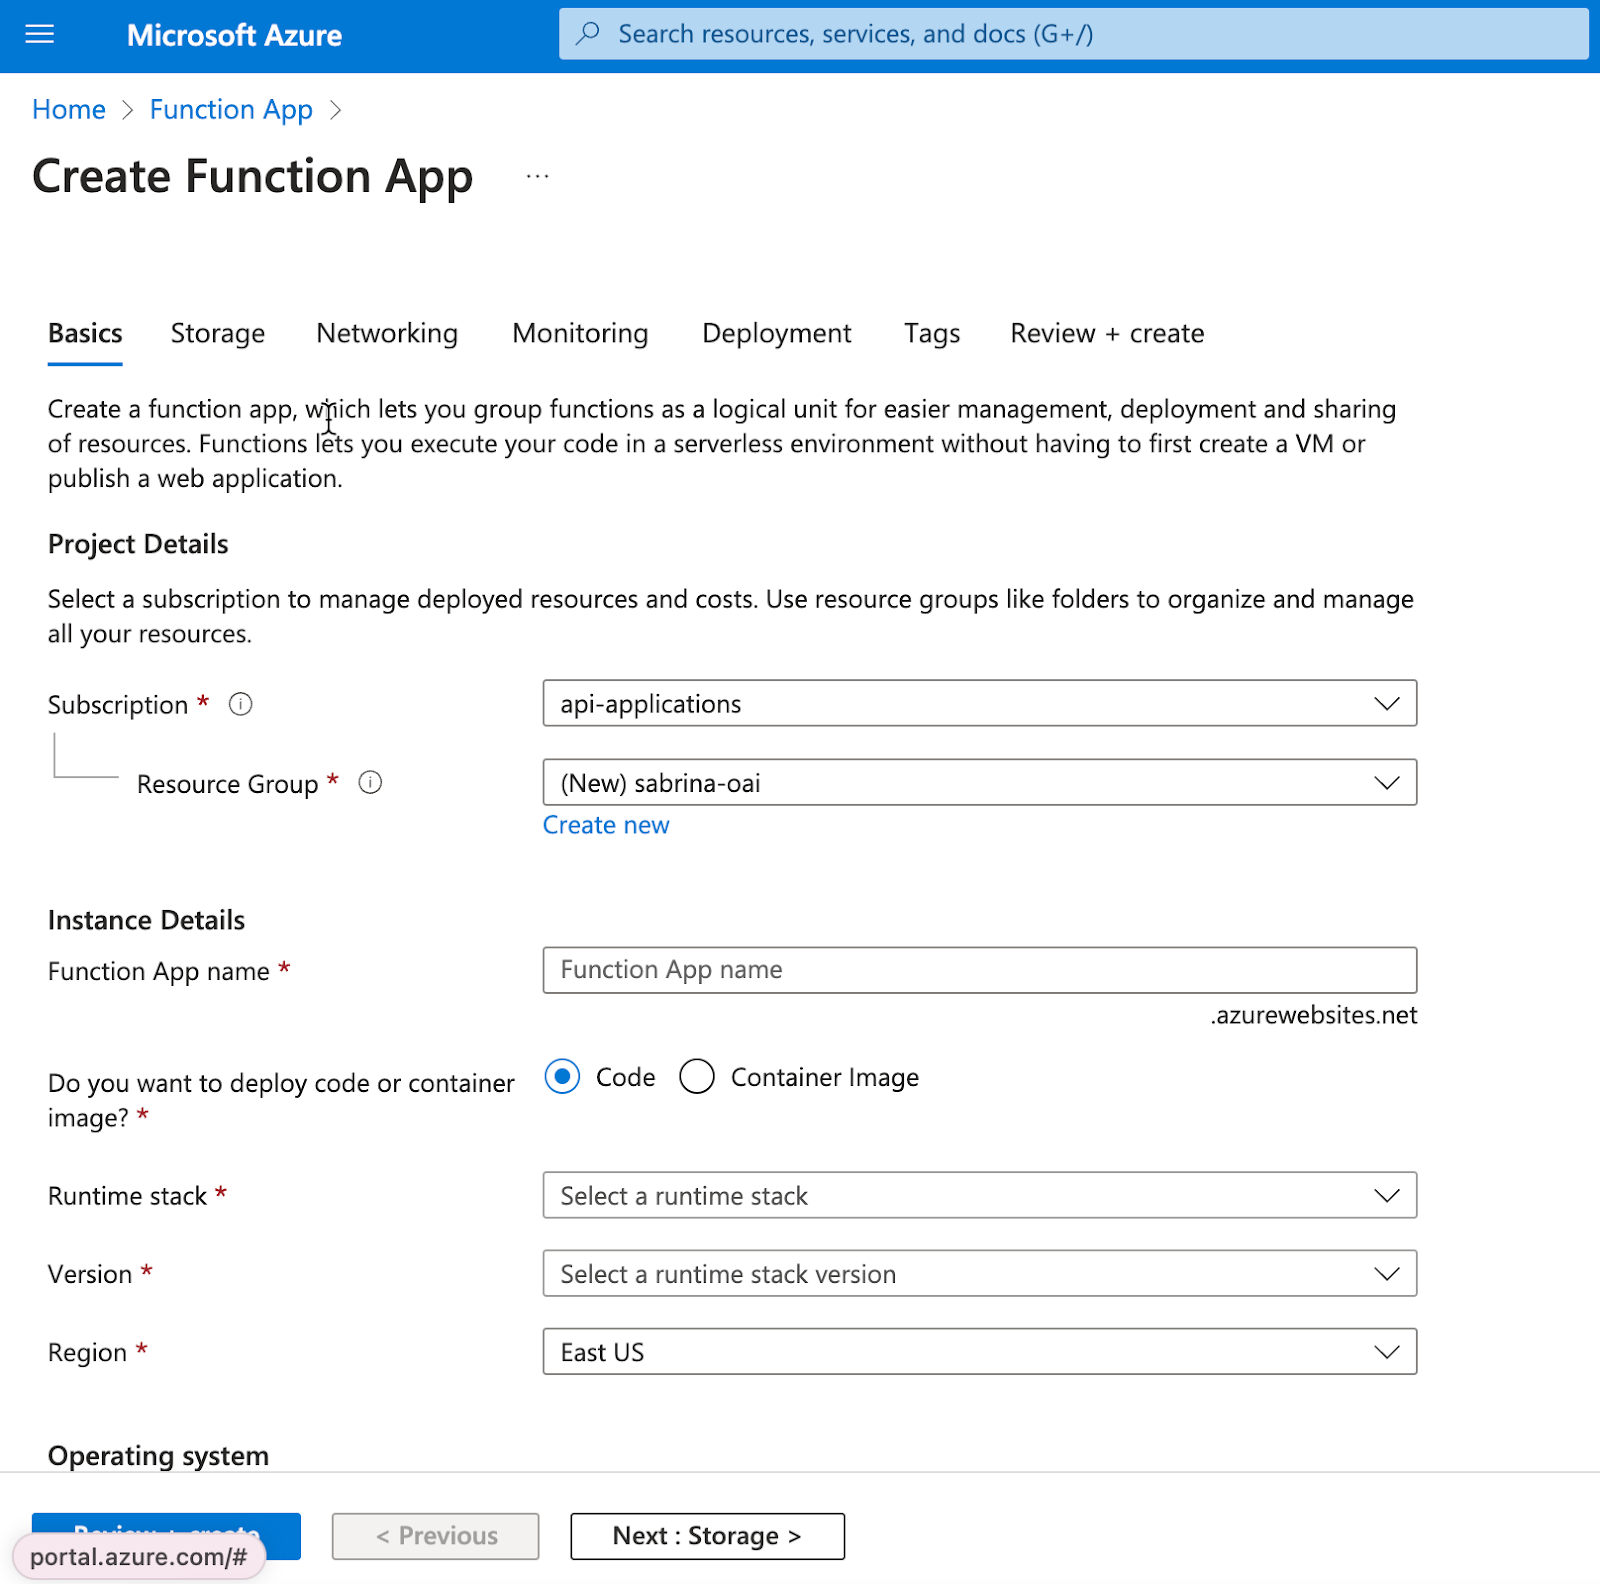
Create an Azure Function app. I used the following settings but you can use anything you are comfortable with. Note that not every language / operating system allows for editing the functions in the console directly - the combination I chose below does. For my walkthrough, I left everything as default and made the selections below. The below settings work out of the box for the SharePoint Node.js solutions here and here.
-
Basics
-
Do you want to deploy code or container image?: Code
-
Runtime stack: Node.js
-
Operating system: Windows
-
-
Networking
- Enable public access: on (need this on to connect to the GPT)
-
-
After completing the above, you’ll land on the “Deployments” page. Once the deployment completes (which should only take a few minutes) click on “Go to Resource” to go back to the Function App
You may get an error the first time you attempt this, click create again and it will likely work.
Part 2: Set up Auth
-
On the left-hand side menu of the Azure Function App, click on Authentication under the Settings menu.
-
Add identity provider
-
Select Microsoft as identity provider.
-
Workforce as tenant type
-
Create a new application. The instructions are fairly similar if you are using an existing application, but it is easier to create a new application as it will have the callback URLs and the API exposed automatically using “Easy Auth”. You can read more about that here.
-
Leave all the other settings on this page as the default, but feel free to change based on your internal guidelines.
-
On the permissions tab, click Add Permission and add Files.Read.All and Sites.ReadAll, then Add. This allows this application to read files which is important in order to use the Microsoft Graph Search API. If you are not using this for the SharePoint solution here and here you can skip this.
-
-
Once it is created, click on the enterprise application you just created (so, leave the Function App page and land on the Enterprise Application that you just spun up). We are now going to give it one more permission, to execute the Azure Function by impersonating the user logging into the application. See here for more details.
-
On the main page, click “View API Permissions”
-
Search for Microsoft Azure App Service in the APIs my organization uses and find user_impersonation
-
Add it, then you’ll need an Admin on Azure Portal to Grant Admin Consent.
-
-
Within that enterprise application, Click on “Expose an API” on the left hand menu under Manage, then copy the scope that was created using the Copy to Clipboard button. The scope should look like “api://<insert-uuid>/user_impersonation”. Save this for later as
SCOPE. -
Click on “Authentication” on the left hand menu under Manage
- Under the Web section, you’ll notice one callback URI was added automatically. Add the Postman redirect URI (https://oauth.pstmn.io/v1/callback) for testing.
-
On the left-hand side, go to Overview. Copy the application (client) ID and and the directory (tenant) ID and save for later as
CLIENT_IDandTENANT_ID.
Part 3: Set up Test Function
-
Leave the page by going home and then back to your Function App.
-
Click on Create Function. For this example, I’m going to develop it in the portal, but you can also use VSCode or another IDE.
-
Choose HTTP trigger
-
For Authorization Level, you can choose any key type you want.
- Note this may error out the first time, but it is likely the Function did create, do a refresh of the page to check.
-
-
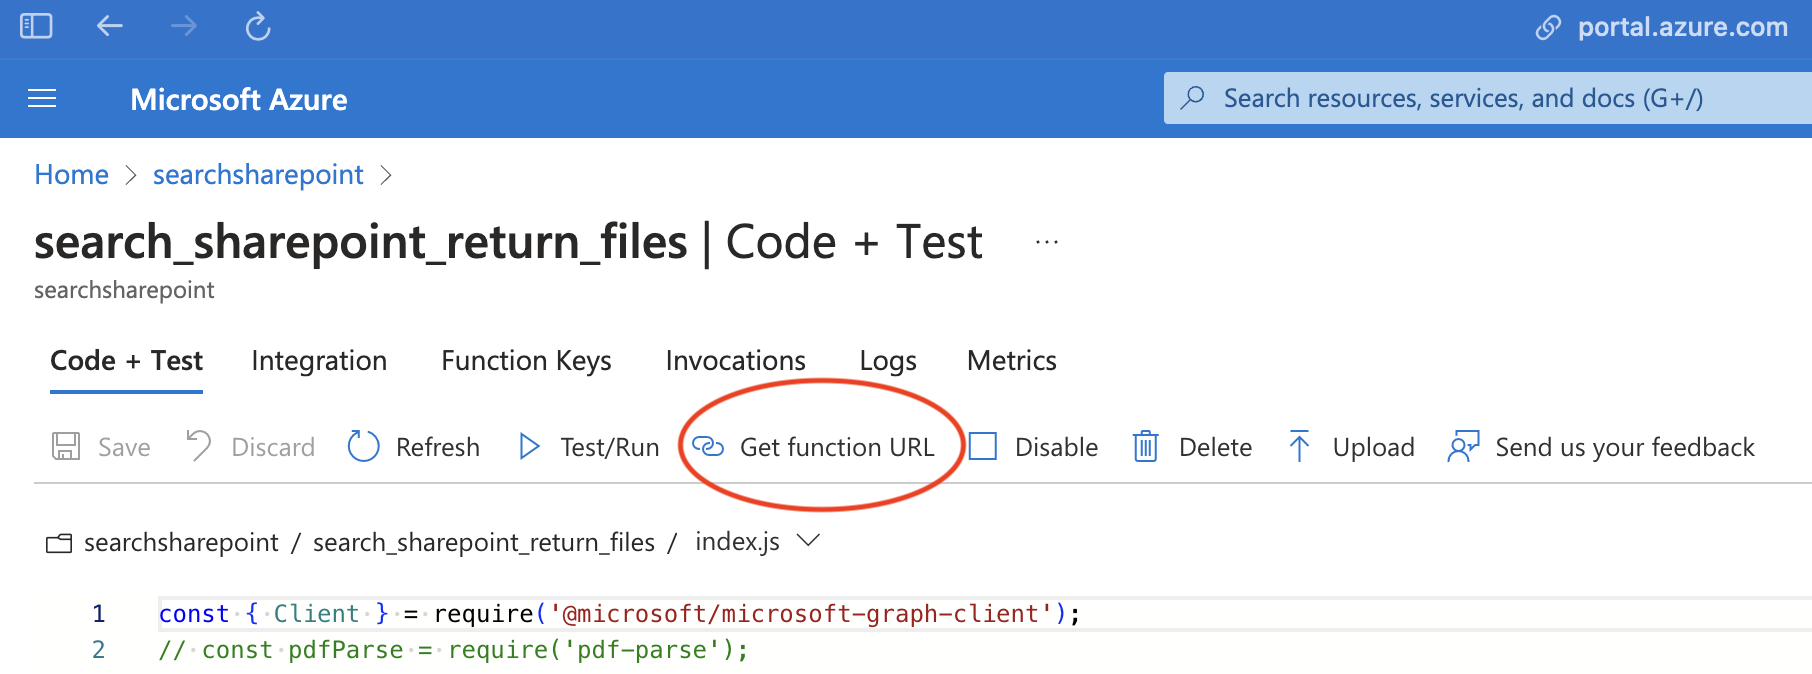
Click on the function you just created (You may need to click refresh to see it). Click on Get Function URL and save it to test in Postman. You will also use this when creating the OpenAPI spec later when you put it into the GPT.
- Go back to the function app and click on Configuration. Show the value for the
MICROSOFT_PROVIDER_AUTHENTICATION_SECRETvariable, copy it (click advanced edit to copy it), and save it for later.
At this point, you should have a test function created, and you should have saved a client id, tenant id, secret, scope, and function URL. You are now ready to test out the authentication in Postman
Part 4: Test Authentication in Postman
-
Try to hit endpoint you created in Postman using those OAuth settings:
-
Grant Type: Authorization Code
-
Auth URL: https://login.microsoftonline.com/`TENANT_ID`/oauth2/v2.0/authorize
-
Auth Token URL: https://login.microsoftonline.com/`TENANT_ID`/oauth2/v2.0/token
-
Client ID:
CLIENT_IDfrom step 7 above -
Client secret:
MICROSOFT_PROVIDER_AUTHENTICATION_SECRETfrom step 11 above -
Scope:
SCOPEfrom step 5 above -
Client credentials: Send client credentials in body
-
-
You will need to click Get New Access Token, and then hit the endpoint you saved in step 10 above. If it was successful, you should get this response:
”This HTTP triggered function executed successfully. Pass a name in the query string or in the request body for a personalized response.”
Part 5: Set up your Application on an Azure Function
This should be done separately and is specific to your app. See the Sharepoint Cookbook for an example of that.
Part 6: Set up ChatGPT
-
Generate an OpenAPI spec for your endpoint.
-
Paste that into the Actions section of a GPT, and choose OAuth as the authentication type. Fill out the OAuth settings the same way you did for Postman above.
-
Once you save the action, you will see a callback URI at the bottom of the GPT configuration. Copy that URL, then go back to your Function App in the Azure Portal.
-
Click on Authentication under Settings, then click on your Entra application.
-
Once you are there, then click Authentication under the Manage section.
-
Add a new Redirect URI under the Web section of that page, and paste in the Callback URI you got from step 16, then click Save.
-
Test out the GPT and it should work as expected.
ChatGPT Steps
Custom GPT Instructions
This is application specific. See Sharepoint Cookbook for an example
OpenAPI Schema
Once you've created a Custom GPT, copy the text below in the Actions panel. Have questions? Check out Getting Started Example to see how this step works in more detail.
Below is an example of what connecting to this Middlware might look like. You'll need to insert your application's & function's information in this section.
openapi: 3.1.0
info:
  title: {insert title}
  description: {insert description}
  version: 1.0.0
servers:
  - url: https://{your_function_app_name}.azurewebsites.net/api
    description: {insert description}
paths:
  /{your_function_name}?code={enter your specific endpoint id here}:
    post:
      operationId: {insert operationID}
      summary: {insert summary}
      requestBody:
{the rest of this is specific to your application}
Authentication Instructions
Below are instructions on setting up authentication with this 3rd party application. Have questions? Check out Getting Started Example to see how this step works in more detail.
Pre-Action Steps
Before you set up authentication in ChatGPT, please take the following steps in the application.
Follow steps 2 & 4 above to setting up authentication
In ChatGPT
In ChatGPT, click on "Authentication" and choose "OAuth". Enter in the information below.
- Client ID: see step 12 above
- Client Secret: ditto
- Authorization URL: ditto
- Token URL: ditto
- Scope: ditto
- Token: ditto
Post-Action Steps
Once you've set up authentication in ChatGPT, follow the steps below in the application to finalize the Action.
See above for testing out this application
Are there integrations that you’d like us to prioritize? Are there errors in our integrations? File a PR or issue in our github, and we’ll take a look.